Winter forage season is around the corner. You are about to spend a ton of money on feed that provides the base to your herds ration. Why not take the time to plan ahead and make this the best crop you’ve ever fed, and the most profitable. 
First, evaluate last year’s results.
How would you rate your forage from last year? High quality Pretty good Adequate Fair My vet bill was huge
How dense was the pack? Really tight Fairly firm OK Easy to grab a handful Like pillow stuffing
How much crust or slime is on top? None! One or two spots A thin layer Several inches I hire a full time silage-pitcher
What does it smell like? It doesn’t Vinegar-high acetic acid Sweet-yeasty and unstable Burnt, tobacco-dry heat damage Wet, slimy, fishy-clostridial and high nitrogen
What was the pile slope? Great 4′ of run to 1′ of rise OK 3′ of run to 1′ of rise Caution! 2′ of run to 1′ of rise Danger!! steeper than that
Did your feed last as long as you predicted? Had some left over Turned out just right Scraping for every grain Still paying the feed bill
Are your piles safe? Yes, no accidents and the drive over piles are working! Somewhat, I try not to think about it My workmen’s comp went through the roof
Now, take a look at what you did to prepare last year, and pick out some management changes you can make to increase forage quality and quantity. We find most can benefit from harvest at correct time, inoculating with the right batch of bacteria, making drive over piles, and covering with oxygen barrier.
Start by meeting with your nutritionist and your forage advisor/expert.
Figuring out your forage strategy now gives you control over much of the harvest and ensiling process. Meeting to plan the harvest, storage and feedout of this years crops is crucial to the quality of feed, the labor that will be required to get the feed to the cows, and the safety of all at the dairy.
Here is the agenda:
Review the crop you have for harvest: acreage, order the fields may come off in, moisture content, and use of inoculants.
1. Acreage: How many tons are you expecting from each field? This will help later as you figure out how much inoculant and covering to purchase, as well as discussing filling rates and packing densities, how long harvest should take, and how much equipment you’ll need.
2. Order the fields are ready to harvest: Drier soils, cultivar characteristics and wind direction may play a part in when harvest happens. Keep a close eye out for changes.
3. Moisture content: Winter forage is best harvested for silage at 32 – 40% Dry Matter (DM). Use this as a guideline – talk with your nutritionist about specific objectives. Springtime weather can shift the crop DM quickly! A rain shower or wind changes levels FAST.
4. Chop length: Current recommendations are to harvest grass and alfalfa at a theoretical length-of-cut (TLC) of 3/8 to 1/2 inch. Check this site for more information: http://www.qualitysilage.com/cutting-harvesting/chop-length.html
5. Inoculants: Different inoculants are used in different situations. For information on how to decide on an inoculant and how to use it, see this Lallemand site: http://www.qualitysilage.com/inoculants/things-to-consider.html . Further information is provided by Dr. Limin Kung. In this article published by Hoard’s Dairyman, he explains the differences and how to use inoculants http://www.qualitysilage.com/inoculants/PDF/HoardsInoculantArticle.pdf . Prepare yourselves for the possible scenarios you might come up against and plan for which inoculants you will use.
Chances are good with this year’s wet weather your winter forage will be on the high side of wet. Dr. Kung recommends in this article using a homolactic acid-based inoculant to run intereference with clostridial bacterial fermentation. Using this kind of inoculant will inhibit butyric acid, resulting in less protein degradation. Checking DM’s are a crucial part of the inoculant decision for winter forage.
Tour your forage storage area and discuss pile dimensions, pad preparation, and packing density.
1. Pile dimensions: We recommend drive over piles that are shaped so that water runs off and drains away. Side slopes should not exceed a 3:1 ratio. Piles should be no higher than 16 feet. This translates not only to better feed, it is so much safer for all on the dairy.
2. Pad preparation: In a perfect world every dairy would have a wide expanse of cement or asphalt to build piles on. If this is not the case at your dairy, prepare your area by hauling in heavy soil as needed then leveling it with a slight slope running in one direction.
3. Packing density: Piles should be packed at a minimum of 15 pounds of dry matter per cubic foot. Control the flow of material to the pit based on the weight of the pack tractor(s) and use the “800 rule”, a quick formula. For example, two 40,000 pound pack tractors are in use 100% of the time, (total of 80,000 pounds) divided by 800 = 100 tons per hour is the flow rate needed for proper packing. This equates to eight to nine 10-y wheel trucks or four to five semis per hour. Any faster than this rate will compromise density and dry matter recovery. Here is an excellent article by Dr. Bob Charley on packing density and how to achieve optimal rates: http://www.qualitysilage.com/silage-management/PDF/Silage_Density_Update.pdf.
Discuss silage covering and sealing.
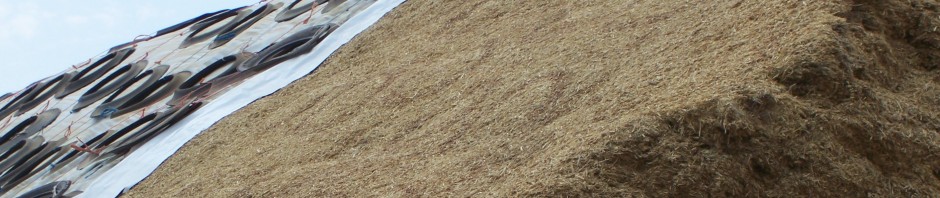
1. Silage covering: Decide which covering you will use and how it will be applied. Choose a silage plastic system that protects your forage and allows proper fermentation. Use an oxygen barrier film like Silostop first, then follow with a traditional 5 ml black white plastic. Be aware of plastic properties and be sure to be clear on the options and instructions given to the covering crew. For more information, seehttp://www.agweb.com/dairytoday/Article.aspx?id=151023 .
2. Sealing: Getting a good seal on your pile will make all the difference. Decide on a strategy for keeping the plastic down and air out. Using gravel bags may save you on plastic as opposed to tires and they delete the tire inventory issue . Overlap joins by at least 2ft when using gravelbags, or 4-5ft when using tires. Use a solid row of gravelbags or tires on all joins. Make sure you have enough plastic around the edges (I like to call it hem) so your gravel bags can do their job.
Set the date now for a short team meeting with your entire team, so everyone knows what is expected, the goals of the harvest, and the time frame. Your invitees are: your nutritionist, your chopping contractor, your covering contractor, your employees involved in harvest. It should be a short tailgate meeting located somewhere in the area where the feed will be stored. Preparing in this way may sound like a lot of monkey business, but the result will be a smoother operation and a safer harvest.
Your to-do list before harvest: Check off these items as you go – many have a safety slant to them. You might have more specific items to add.
1. Equipment – If you use a contractor, contact him with your expected dates. Tell him what kind of inoculant you will be using and give any specific instructions on applying. If you are using your own equipment, tune it up, sharpen it up, and make sure all safety guards and placards are attached and visible. Are the inoculant tanks clean and will attach snugly to the machine? Check equipment for safety belts, PTO guards, reminders to shut down equipment when unplugging it, a place for driver water jug, clean windows, a loaded grease gun and fire extinguisher.
2. Pad or Storage Area – Clean up old feed, trash, tire piles, old silage plastic. Level off dirt areas allowing correct slope away from the pile or bunker area. Fill any holes. If you are working on cement or asphalt, clean it up. Spray paint exactly where you want the pile borders to be.
3. Inoculant – Order the inoculant you and your nutritionist or forage consultant have decided upon and take delivery. Pay attention to storage and handling instructions. Inoculants are alive, don’t kill them with heat. Keep inoculant in a freezer or refrigerator until mixed. Family members will appreciate you purchasing a “storage unit” exclusively for inoculant and silage samples, if you haven’t already done so.If you are using different formulations, be sure it is clear which one goes on which fields.
4. Covering – Order the covering you have decided to use and be clear in your instructions. Use brand names to identify exactly what materials you want to use. Check your figures to make sure you have enough.
UPDATE: March 2012: Silostop Oxygen Barrier Clear now has an ORANGE tint to it. No other silage plastic looks like it.

- Covering with black white over Silostop
Before harvest starts, assemble the team.
Before the first chopper hits the field, host a short tailgate meeting. Invite everyone you involve in making forage to come. You’ll want to include your nutritionist, your chopping contractor, your covering contractor and everyone you employ in the process. Yes, this is a busy time, but try to get as many as possible there. A 30 to 40 minute huddle will go a long way towards making your best forage ever!
Here is your agenda:
1. Introduce everyone – Explain what each team members job is. Hand out a wallet-size phone list printed on cardstock including emergency numbers, your number, the chopper, covering contractor, crew bosses and your nutritionist. And for good measure, include this one – Ron Kuber 559-779-5961 – for any questions or supplies you will need. Also, put a reminder that if someone gets hurt, call 911. Add the number for your local fire department, sheriff, and hospital.
2. Field tour – Check the crops, review the field identification and discuss optimal moisture contents. Talk about the use of inoculants and specify what is to be used. Make it clear that inoculants contain live micro-organisms and need to be handled properly to maintain viability. Explain that application rates should be checked several times a day and that even distribution is a key factor in inoculant’s ability to help the fermentation process.
3. Field to dairy site – Make sure everyone knows the best route to take from point to point and the flow of traffic. Good neighbor hint: A few days before the start of harvest, talk to families on the route to let them know what days you will be hauling. The road might be a little muddy, and large trucks and equipment may be on the road. Caution them that they may want to keep an extra sharp eye on kids and animals.
4. Dairy site – Show everyone where the forages will be stored, and explain what the dimensions of the piles will be. Teach the pack tractor drivers how you want the forage packed and emphasize that efficient work is expected, and hurrying to finish without sufficient packing won’t be tolerated. Achieve a high packing density (minimum of 15 pounds per cubic foot). Shape all surfaces so water drains off the bunker or pile, and the back, front, and side slopes should not exceed a 3:1 slope. If filling after a break, e.g. overnight, do not pack previous session’s surface. This only forces more air into the packed heap. Do not spend time packing the last load excessively. Pack it the same amount as all the other loads.
Discuss the covering process and what materials will be used to cover and seal the piles. Explain the use of Silostop 2-step clear (first step Silostop, second step traditional black/white plastic) or Silostop 1-step white on black. Overlap joins by at least 2ft when using gravelbags, or 4-5ft when using tires. Use a solid row of gravelbags or tires on all joins. Hems on the ends and sides of piles should be long enough to allow gravel bags to seal those edges.
5. Questions – Make sure everyone is clear on your expectations for this year’s harvest and that they have no questions.
6. Finally, emphasize SAFETY. Encourage all at the meeting to think before acting; be careful, watchful and supportive. If an accident does happen, report it immediately.
This may sound like a simple team meeting, but sorting out the details well in advance will assure a smooth harvest and great feed.
Finally, turn the key, start the engines!
If you have any questions please call Ron at 559-779-5961.
