In the next few entries, we’ll outline a plan for putting up the best forage you’ve ever made. I bet your Grandma “put up” tasty tomatoes, peaches, jams and pickles. She was probably pretty fussy about the ingredients, the process, recipe and correct storage – making sure everything was just right meant safe food for her family all the way through winter. Just like Grandma, you are particular about all the things that go into your herd’s feed ration. With winter forage harvest around the corner, now is the time to plan the year’s menu.

Step one: Meet with your nutritionist and your forage advisor/expert.
Figuring out your forage strategy now gives you control over much of the harvest and ensiling process. Meeting to plan the harvest, storage and feedout of this years crops is crucial to the quality of feed, the labor that will be required to get the feed to the cows, and the safety of all at the dairy.
Here is the agenda:
Review the crops you have for harvest: acreage, order the fields may come off in, moisture content, chop length and use of inoculants.
1. Acreage: How many tons are you expecting from each field? This will help later as you figure out how much inoculant and covering to purchase, as well as discussing filling rates and packing densities, how long harvest should take, and how much equipment you’ll need.
2. Order the fields are ready to harvest: Drier soils, cultivar characteristics and wind direction may play a part in when harvest happens. Keep a close eye out for changes.
3. Moisture content: Corn is optimally harvested for silage between 32 and 38% DM and corn at greater than 30% DM will benefit from using a kernel processor at harvest time. Alfalfa is optimally harvested between 35 and 45% DM (depending on storage structure) and between bud and one-tenth bloom. Maturity can be monitored by kernel milkline development, as kernels mature from blister to physiological maturity (blackline). See this Lallemand link for illustrations and more information: http://www.qualitysilage.com/cutting-harvesting/dry-matter.html
4. Chop length: Current recommendations are to harvest grass and alfalfa at a theoretical length-of-cut (TLC) of 3/8 to 1/2 inch and corn at a TLC of 1/2 to 3/4 inch. Again, the Lallemand site for chop length: http://www.qualitysilage.com/cutting-harvesting/chop-length.html
5. Inoculants: Different inoculants are used in different situations. For information on how to decide on an inoculant and how to use it, see this Lallemand site: http://www.qualitysilage.com/inoculants/things-to-consider.html . Further information is provided by Dr. Limin Kung. In this article published by Hoard’s Dairyman, he explains the differences and how to use inoculants http://www.qualitysilage.com/inoculants/PDF/HoardsInoculantArticle.pdf . Prepare yourselves for the possible scenarios you might come up against and plan for which inoculants you will use.
Tour your forage storage area and discuss pile dimensions, pad preparation, and packing density.
1. Pile dimensions: We recommend drive over piles that are shaped so that water runs off and drains away. Side slopes should not exceed a 3:1 ratio. Piles should be no higher than 12 feet.
2. Pad preparation: In a perfect world every dairy would have a wide expanse of cement or asphalt to build piles on. If this is not the case at your dairy, prepare your area by hauling in heavy soil as needed then leveling it with a slight slope running in one direction.
3. Packing density: Piles should be packed at a minimum of 15 pounds of dry matter per cubic foot. Here is an excellent article by Dr. Bob Charley on packing density and how to achieve optimal rates: http://www.qualitysilage.com/silage-management/PDF/Silage_Density_Update.pdf . 
Discuss silage covering and sealing.
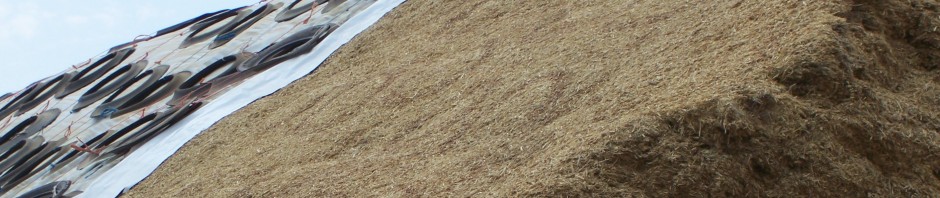
1. Silage covering: Decide which covering you will use and how it will be applied. Choose a silage plastic system that protects your forage and allows proper fermentation. Use an oxygen barrier film like Silostop first, then follow with a traditional 5 ml black white plastic. Be aware of plastic properties and be sure to be clear on the options and instructions given to the covering crew. For more information, see http://www.agweb.com/dairytoday/Article.aspx?id=151023 .
 UPDATE: March 2012: Silostop Oxygen Barrier Clear now has an ORANGE tint to it. No other silage plastic looks like it.
2. Sealing: Getting a good seal on your pile will make all the difference. Decide on a strategy for keeping the plastic down and air out. Using gravel bags may save you on plastic as opposed to tires and they delete the tire inventory issue . Overlap joins by at least 2ft when using gravelbags, or 4-5ft when using tires. Use a solid row of gravelbags or tires on all joins.
Finally, make sure your piles are safe. The number 1 cause of forage accidents is overfilling or making piles too tall. Planning for safe removal of feed every day is important to workers safety and feed quality. Look into face shaving equipment and methods.
Making a plan with your nutritionist is the first step to successful silage. You’ll want to have a follow-up meeting with your entire staff plus any chopping or covering contractors before harvest. Look for that meeting agenda in future posts.
Please feel free to give Ron a call at 559-779-5961 for any additional information or help in planning your harvest.
Thanks to Dr. Bob Charley, Dr. Renato Schmidt and Dr. Keith Bolsen for editing this article and to Dr. Bolsen for his photo contributions…

Hi Connie,
This post is TERRIFIC!! Your writing is so much fun to read … you have a special talent!!
Keith